If you’ve ever struggled to cook dried beans just right, you’re not alone. Beans can be tricky—they take forever to soften, and guessing the cooking time often leads to mushy or hard results.
What if you had a simple, clear chart that tells you exactly how long to pressure cook each type of dried bean? Imagine saving time, avoiding frustration, and getting perfect beans every time. This pressure cooking dried beans chart is your secret weapon to quick, easy, and reliable bean cooking.
Keep reading to unlock the best cooking times and make your meals tastier and stress-free.
Choosing Beans For Pressure Cooking
Choosing the right beans for pressure cooking can make a huge difference in your cooking experience and the final dish’s texture. Not all beans behave the same under pressure, so understanding their varieties, freshness, and preparation needs will save you time and frustration.
Popular Bean Varieties
Some beans are more pressure cooker-friendly than others. Black beans, kidney beans, chickpeas, and navy beans are common choices because they cook evenly and absorb flavors well.
You might want to avoid very small beans like lentils or split peas in your pressure cooker since they cook much faster and can turn mushy quickly. Have you noticed how some beans hold their shape better after pressure cooking? That’s why picking the right variety matters.
Fresh Vs. Older Beans
Freshness plays a big role in cooking time and texture. Older beans tend to take longer to soften, even in a pressure cooker, and sometimes end up tough.
If your beans have been sitting in the pantry for more than a year, expect longer cooking times or uneven results. Testing a few beans by cooking them in boiling water can help you gauge their quality before pressure cooking.
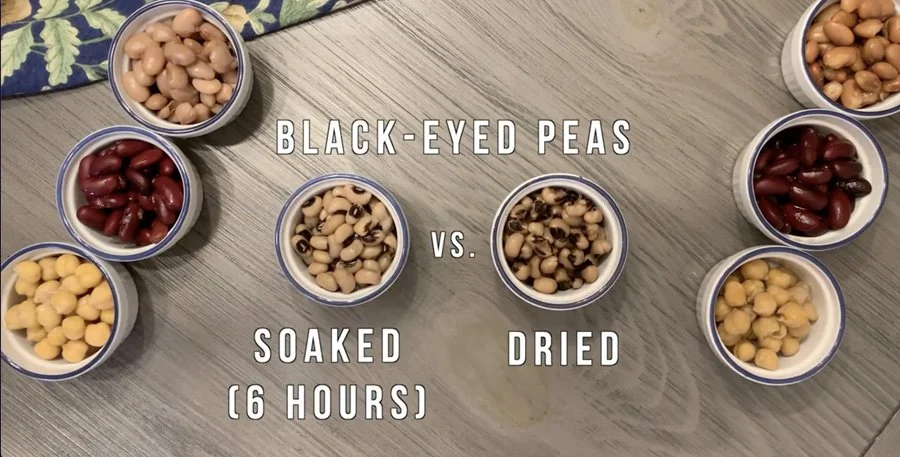
Soaking Beans: Yes Or No
Soaking beans is a debated topic among pressure cooker users. Soaking can reduce cooking time and improve digestibility, but it’s not always necessary.
With a pressure cooker, unsoaked beans still cook relatively fast, but soaking can give you more consistent results and prevent beans from bursting. Have you tried cooking beans without soaking? You might find it saves time, but soaking often delivers a better texture.
Pressure Cooking Basics
Pressure cooking dried beans saves time and energy. It uses high heat and steam to cook beans faster than boiling. Understanding basic pressure cooking helps avoid common mistakes. It ensures soft, tasty beans without long soaking or cooking times.
How Pressure Cookers Work
A pressure cooker traps steam inside a sealed pot. The steam raises the pressure and temperature above boiling point. This high pressure cooks food quickly and evenly. Beans soften faster because heat penetrates deeply. The sealed environment also keeps nutrients and flavors locked in.
Essential Safety Tips
- Always check the sealing ring for cracks or damage.
- Do not overfill the cooker; leave space for steam.
- Use enough liquid to create steam but not too much.
- Release pressure slowly or use natural release methods.
- Never force the lid open before pressure drops.
Types Of Pressure Cookers
Stovetop models heat quickly and reach higher pressure levels. They are simple and durable but need supervision. Electric pressure cookers have built-in timers and settings. They offer convenience and safety features. Both types work well for cooking dried beans. Choose based on your kitchen style and needs.
Bean Cooking Times Chart
Pressure cooking dried beans saves time and energy. This chart shows exact cooking times for various bean types in a pressure cooker. Perfect for quick, tender beans every time.
Pressure cooking offers a quick way to prepare dried beans. Knowing the right cooking time is vital. A bean cooking times chart helps simplify this process. It provides precise cooking times for various beans. This chart is a handy guide for all cooking enthusiasts.
Cooking Times For Common Beans
Cooking times vary for different beans. Kidney beans need about 20 minutes in a pressure cooker. Black beans require around 25 minutes. Chickpeas take a bit longer, about 30 minutes. Lentils are quicker, usually ready in 10 minutes. These times ensure beans are tender and delicious.
Adjustments For Altitude
Altitude affects pressure cooking times. Higher altitudes require longer cooking. Add 5% more time for every 1,000 feet above sea level. This adjustment ensures beans cook evenly. Always check your beans for tenderness.
Soaking Impact On Cooking Time
Soaking beans reduces cooking time. Soaked beans cook faster and more evenly. For instance, soaked kidney beans cook in 15 minutes. Without soaking, they take longer. Soaking also reduces gas-inducing compounds. It’s a step worth considering. Understanding these elements ensures perfect beans every time. Use the chart as a reliable reference. Enjoy your pressure-cooked beans with confidence.

Credit: www.amazon.com
Preparing Beans For Pressure Cooking
Preparing dried beans for pressure cooking is a simple process that can greatly affect the texture and flavor of your final dish. Taking a few moments to rinse, sort, soak, and season your beans ensures even cooking and enhances taste. These steps also help reduce cooking time and improve digestibility, making your beans easier on your stomach.
Rinsing And Sorting
Start by pouring your dried beans into a colander or bowl. Rinse them under cold running water to remove dust and dirt. While rinsing, look closely for small stones, broken beans, or debris and pick them out. This step might seem tedious, but it prevents unpleasant surprises later.
Pre-soaking Methods
Soaking beans before pressure cooking can speed up the cooking time and make beans softer. You can soak them overnight in plenty of water—about three times the volume of beans. If you’re short on time, try the quick soak method: boil beans in water for 2 minutes, then let them sit covered for an hour.
Have you noticed how soaked beans often cook more evenly? Skipping this step may lead to some beans being undercooked while others are mushy. Soaking also helps reduce certain compounds that cause gas.
Using Seasonings And Aromatics
Add flavor to your beans by including seasonings and aromatics during cooking. Common choices are garlic cloves, bay leaves, onion slices, or herbs like thyme. Avoid adding salt or acidic ingredients like tomatoes before cooking, as these can toughen the beans.
Think about the dish you want to create. Would a smoky chipotle pepper or a sprig of rosemary elevate your beans? Adding these at the start allows the pressure cooker to infuse the flavors deeply, making your meal more delicious.
Step-by-step Cooking Process
Cooking dried beans in a pressure cooker can save you a lot of time and effort. However, getting it just right requires attention to detail. Understanding the step-by-step process will help you enjoy perfectly cooked beans every time without the guesswork.
Setting Pressure And Time
Most dried beans cook well at high pressure. You’ll usually set your pressure cooker to the “High” setting. The cooking time depends on the type of bean and whether they are soaked.
Here’s a quick reference table for common beans at high pressure:
| Bean Type | Soaked Cooking Time (minutes) | Unsoaked Cooking Time (minutes) |
|---|---|---|
| Black Beans | 8-10 | 20-25 |
| Chickpeas (Garbanzo) | 12-15 | 35-40 |
| Kidney Beans | 10-12 | 25-30 |
| Lentils | 5-7 | Not recommended |
Always add enough water to cover the beans by at least 2 inches. This prevents burning and ensures even cooking.
Natural Vs. Quick Release
After cooking, you must release the pressure before opening your cooker. You can either let it release naturally or use the quick release method.
- Natural Release:The pressure decreases on its own, which can take 10-20 minutes. This method helps beans finish cooking gently and reduces splitting.
- Quick Release:You manually release the pressure by opening the valve. It’s faster but can cause beans to break or foam to sputter out.
If you want creamy beans for soups or dips, natural release works best. But if you are in a hurry, quick release gets the job done with a bit more care needed.
Troubleshooting Common Issues
Sometimes beans don’t turn out as expected. If they are still hard after cooking, your pressure cooker might not be reaching full pressure or the cooking time was too short.
Foaming and sputtering during cooking usually mean too many beans or too little water. Reduce bean quantity or add extra water next time.
Have you noticed your beans splitting apart? This often happens if you use quick release or overcook them. Try natural release and reduce cooking time slightly.
Remember, every pressure cooker behaves a bit differently. Keep notes on your results to fine-tune the process for your kitchen setup.

Credit: primarybeans.com
Tips For Perfect Texture
Achieving the perfect texture for pressure-cooked dried beans enhances every meal. The right balance between softness and firmness makes beans enjoyable and digestible. Small adjustments in cooking time or water can change the texture significantly.
Understanding how to control the cooking process helps you get consistent results. This section offers practical tips to avoid common mistakes and match bean texture to your recipes.
Avoiding Overcooking
Overcooked beans become mushy and lose their shape. To prevent this, follow the recommended cooking times closely. Use the pressure cooker’s natural release method to finish cooking gently. Quick release may shock the beans and cause splitting.
Check beans a few minutes before the timer ends, especially if your pressure cooker runs hot. Remember, different beans cook at different speeds. Always adjust time according to the bean type and size.
Balancing Firmness And Softness
Some recipes need firmer beans, others softer ones. Start with less cooking time for firm beans and increase if needed. Soaking beans overnight helps soften them and reduces cooking time. Use enough water to cover beans by at least two inches to keep them moist.
Stir beans gently after cooking to test texture. If they feel too hard, close the lid and cook a few more minutes. Avoid stirring too much during cooking to keep beans intact.
Adjusting For Different Recipes
Soups and stews usually require softer beans that easily break down. Salads or side dishes benefit from firmer beans that hold shape. Adjust cooking time accordingly, reducing it for salads and increasing it for soups.
Beans absorb flavors better when cooked just right. Experiment with small batches to find the perfect texture for each recipe. Keep notes on cooking times and water ratios for future reference.
Storing And Reheating Cooked Beans
Storing and reheating cooked beans properly keeps their flavor fresh and texture just right. It also helps you save time and reduce food waste. Knowing how to handle your cooked beans after pressure cooking can make your meals easier and more enjoyable throughout the week.
Proper Storage Methods
Always let your beans cool down to room temperature before storing. Hot beans create condensation, which can lead to spoilage faster.
Use airtight containers or heavy-duty resealable bags to keep beans fresh. Label them with the date so you know how long they’ve been stored.
Keep cooked beans in the fridge for up to 5 days. If you notice any off smell or slimy texture, discard them immediately to avoid foodborne illness.
Freezing Tips
Freezing cooked beans is a great way to extend their shelf life up to 3 months. Portion them into small containers or freezer bags for easy thawing later.
Remove as much air as possible from bags before sealing to prevent freezer burn. Don’t forget to leave some space for expansion during freezing.
Label your containers with the date and type of bean to avoid confusion later. Frozen beans can be thawed overnight in the fridge or quickly in warm water.
Reheating Without Mushiness
Reheating beans can be tricky—too much heat and they turn mushy, too little and they stay cold. Heat them gently over low to medium heat while stirring occasionally.
Add a splash of water or broth to keep beans moist and prevent drying out. Avoid reheating in the microwave for too long, as it often causes uneven heating and mushiness.
Have you ever noticed how reheated beans sometimes lose their bite? Try reheating them just until warm, not boiling, and your beans will hold their shape and texture better.
Credit: www.cookingwithanadi.com
Frequently Asked Questions
How Long To Pressure Cook Dried Beans?
Pressure cook dried beans for 10 to 30 minutes. Cooking time varies by bean type and size. Always check your pressure cooker manual for specific guidelines.
Do Dried Beans Need Soaking Before Pressure Cooking?
Soaking dried beans is optional but recommended. Soaking reduces cooking time and improves digestion. Unsoaked beans require longer pressure cooking.
What Is The Water Ratio For Pressure Cooking Beans?
Use 3 cups of water per 1 cup of dried beans. Ensure enough water to prevent burning and allow proper pressure build-up.
Can I Cook Mixed Beans Together In A Pressure Cooker?
Yes, but choose beans with similar cooking times. Mixed beans with different textures may result in uneven cooking. Adjust cooking time accordingly.
Conclusion
Pressure cooking dried beans saves time and effort. Use the chart to know exact cooking times. This helps avoid mushy or undercooked beans. Beans cook faster and taste better with pressure cooking. Keep the chart handy for easy meal planning.
Enjoy healthy, delicious beans with less guesswork. Try different beans to add variety to meals. Cooking beans has never been this simple. Ready to cook perfect beans every time? This chart makes it easy and reliable.

Hi, I’m Daniel Brooks—a food lover and kitchen gear enthusiast. I enjoy testing cookware, utensils, and gadgets to see what really works in everyday cooking. At seashell-kudu-262783.hostingersite.com, I share honest reviews, comparisons, and simple guides to help you choose the best tools for a safer, smarter, and more enjoyable kitchen.
Related posts:
 What Type of Cooking Utensils are Safe: Expert Picks
 What Innovations Could Blenders Make: Unleashing Future Tech
 Smart Strategies to Organize a Small Kitchen: Maximize Space
 How to Organize a Kitchen Cabinet: Expert Tips & Tricks
 How to Organize Kitchen Drawers: Expert Tips and Tricks
 How to Organize a Corner Kitchen Cupboard: Expert Tips

